
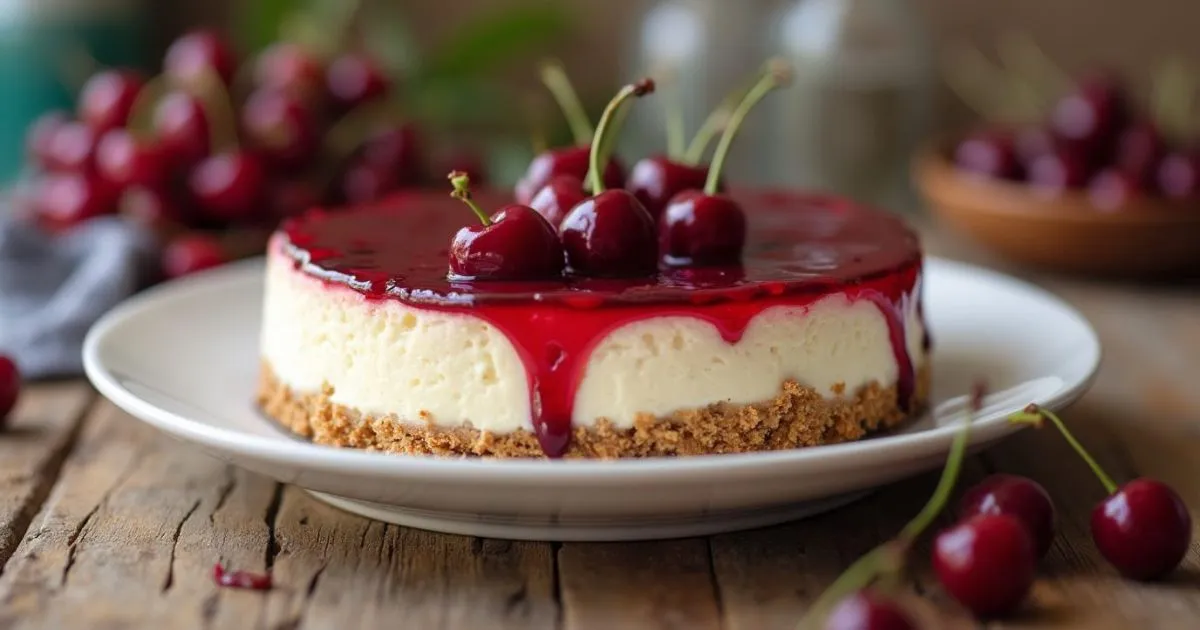
No Bake Cherry Cheesecake – Easy & Creamy Recipe
Table of Contents
Introduction: A Sweet Treat Without the Hassle
Imagine craving a rich, creamy cheesecake but dreading the time-consuming baking process. You want something decadent yet effortless, a dessert that satisfies your sweet tooth without requiring hours in the kitchen. Enter the No Bake Cherry Cheesecake the ultimate solution for a hassle-free, mouthwatering treat. Whether you’re preparing for a family gathering, a holiday celebration, or simply indulging in a personal craving, this recipe will quickly become your go-to favorite.

Why This No Bake Cherry Cheesecake is a Must-Try
- No Oven Needed – Perfect for warm weather or when you want a quick dessert.
- Rich & Creamy Texture – A silky smooth cheesecake base topped with luscious cherries.
- Effortless Yet Impressive – Great for beginners yet elegant enough for special occasions.
- Easily Customizable – Swap toppings or crusts to suit your taste.
Ingredients for No Bake Cherry Cheesecake
Crust Ingredients
| Ingredient | Quantity |
|---|---|
| Graham cracker crumbs | 1 ½ cups |
| Melted butter | ½ cup |
| Sugar | ¼ cup |
Cheesecake Filling Ingredients
| Ingredient | Quantity |
| Cream cheese (softened) | 16 oz (2 packages) |
| Powdered sugar | ¾ cup |
| Vanilla extract | 1 tsp |
| Heavy whipping cream | 1 cup |
Topping
| Ingredient | Quantity |
| Cherry pie filling | 1 can (21 oz) |
Step-by-Step Guide to Making No Bake Cherry Cheesecake
Step 1 – Preparing the Crust
- In a bowl, combine graham cracker crumbs, melted butter, and sugar.
- Mix until the crumbs are evenly coated and resemble wet sand.
- Press the mixture firmly into the bottom of a springform pan.
- Refrigerate for 30 minutes to set.
Step 2 – Making the Creamy Cheesecake Filling
- Beat softened cream cheese, powdered sugar, and vanilla extract until smooth and creamy.
- In a separate bowl, whip the heavy cream until stiff peaks form.
- Gently fold the whipped cream into the cream cheese mixture to maintain a light and airy texture.
- Spread the filling evenly over the chilled crust.
Step 3 – Adding the Cherry Topping
- Spoon the cherry pie filling evenly over the cheesecake layer.
- Spread it gently to cover the entire surface.
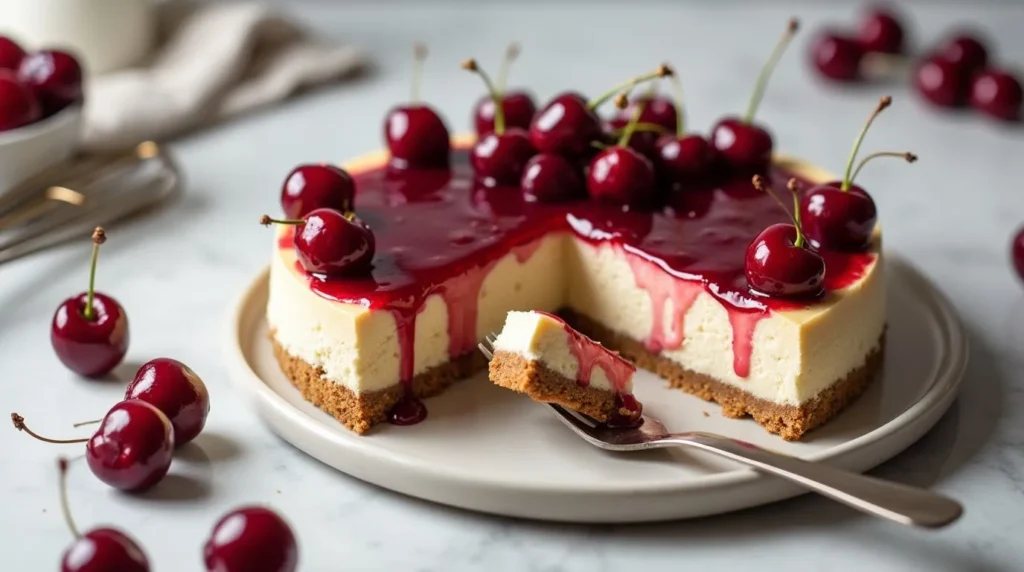
Step 4 – Chilling & Serving
- Refrigerate for at least 4 hours, preferably overnight, for the best texture.
- Once set, carefully remove from the pan and slice.
- Serve chilled and enjoy!
Tips for the Perfect No Bake Cherry Cheesecake
- Use Full-Fat Cream Cheese – Ensures a rich and creamy consistency.
- Chill Long Enough – Allows the cheesecake to firm up properly.
- Experiment with Toppings – Try strawberries, blueberries, or a drizzle of chocolate.
- Use a Springform Pan – Makes it easier to remove the cheesecake without damaging it.
Common Mistakes to Avoid
- Skipping the Chill Time – Leads to a runny cheesecake.
- Overmixing the Cream Cheese – Can make the texture grainy.
- Using Low-Fat Ingredients – May result in a less firm cheesecake.
Frequently Asked Questions (FAQ)
How long does no bake cherry cheesecake last?
It stays fresh in the refrigerator for up to 5 days when stored in an airtight container.
Can I freeze no bake cherry cheesecake?
Yes! Wrap it tightly and freeze for up to 2 months. Thaw in the fridge before serving.
Can I use fresh cherries instead of canned filling?
Absolutely! Cook fresh cherries with sugar and cornstarch to create a homemade topping.
What can I use instead of graham crackers for the crust?
Crushed Oreos, digestive biscuits, or vanilla wafers make great alternatives.
Conclusion:
This No Bake Cherry Cheesecake is the perfect dessert for any occasion—simple, creamy, and packed with flavor. Whether you’re making it for a holiday, family gathering, or just treating yourself, this foolproof recipe delivers every time. Try it today and experience the creamy indulgence without the hassle. Happy baking
Did you try our desserts ?
There are no reviews yet. Be the first one to write one.